Producing a video abstract
For the DIGICROP 2020 online conference, I had the pleasure to produce a short video abstract for our most recent discussion paper on the ‘Fruchtfolge’ model (link to the discussion paper):
Following the conference, we got some encouraging feedback regarding our work (🤗 thanks so much again!), and a few people asked about instructions on how to (technically) produce a similar video.
In this blog post I will try to outline the major steps involved in the production of the video, as well as some lessons learned that will help you to avoid some of the mistakes I made 😊
Preparation 🚧
In order to produce a video abstract, you need the following hardware:
- Laptop
- Camera (ideally a DSLR, but a phone will suffice)
- Tripod
- Optional: Microphone, or second phone to record audio
Before I began recording the video, I made a transcript for what I would say. I would really recommend to do this (opposed to freestyling your talk given some keywords), because it forces you to think about your key messages and how you would like to communicate them. Be aware that ~150-180 words already produces a video of one minute (!), so keep it as short as possible. The DIGICROP conference had a three minute maximum rule for video trailers, which I think is a really good length.
After I finished writing the transcript, I set-up my room like shown in the pictures:
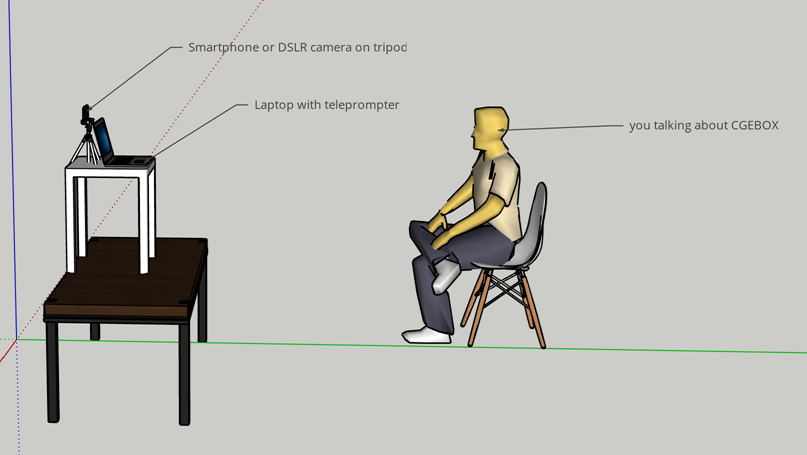
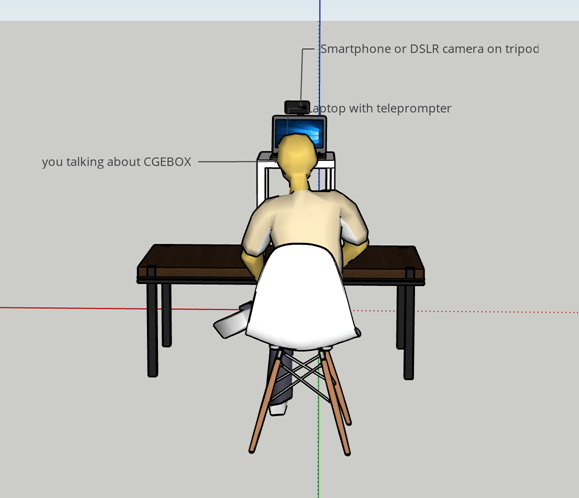
For the teleprompting, I used the (free) website teleprompt.online, where you can paste your pre-written text, and adjust the display size and scrolling speed to your liking. It will also show you how long it will take you to read the text out loud (given the selected prompt speed), which is really helpful as well!
Make sure the camera is right above the laptop screen, as this way it seems like you are looking into the camera (as though you are reading from the teleprompter 🤓).
Recording 🎥
Now that you have everything set-up, you are ready to start recording!
I would recommend to record the whole text in the same position (the one indicated in the pictures). Even if you will overlay the video with a screen recording later, this way the sound quality stays the same. I forgot about this when making my video and that’s why the sound quality changes frequently…
Optionally, you can place a phone very close to your mouth (but out of sight of the camera), and use it to record the audio using a voice memo app. Make sure to clap once when starting the recording, this makes it easier to align the sound of the camera recording and the one of the phone when cutting the video later 😛. Again, this is optional, but I think it really increases the quality of the sound!
Another thing I would recommend is to always record sections shorter than 2 minutes. For me it was very difficult to record longer sections without screwing up something (reading from teleprompter is not so easy I figured)…
Screen recordings
After recording the video and sound tracks, you can start recording your screen.
There are many possible ways for recording the screen, however both macOS (more info here) and Windows 10 (more info here) have built-in software for screen recording which should totally suffice.
As you already have the video of yourself speaking about your research, you can now sit in front of your computer, listening to your video through headphones, and record the screen showing the things you talk about. That part is quite easy then 😊
Editing
Now that you have all your raw video and sound materials ready, you can start cutting the video.
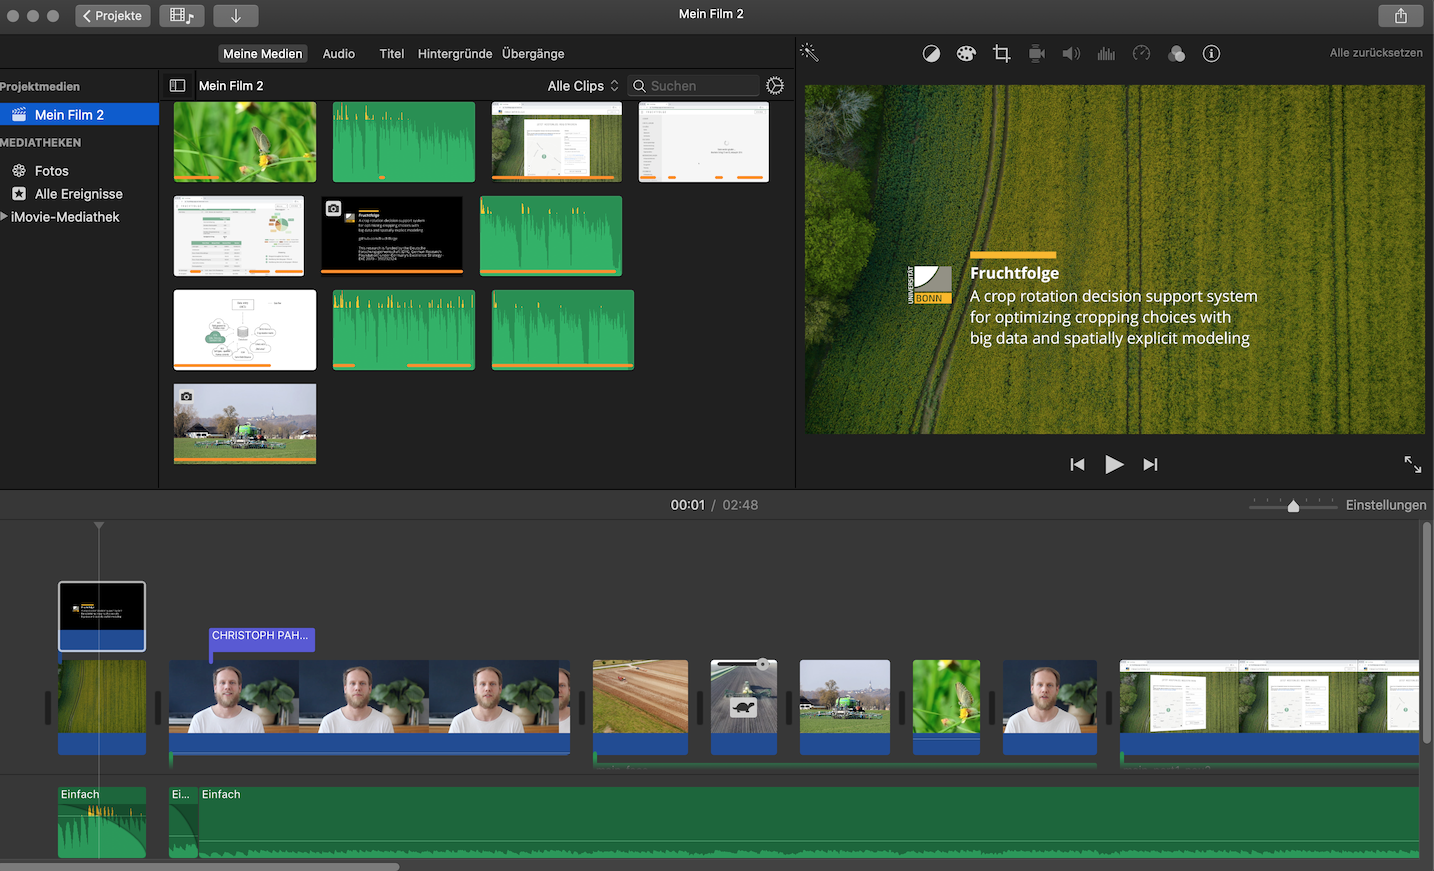
If you’ve got a Mac, you can use iMovie, which also has a nice sound library to include some background music. If you’re working on a computer with Windows 10 installed, you can use the built-in video editor called „Video-Editor“ (this is part of the Windows „Photos“ App). If you want to include some background music, you can get some royalty-free jingles from websites like bensound.
With any of these video editing tools, you can also create an intro and outro video section. Those sections typically include the title of your work, as well as your name (etc.).
In my video, I also added some royalty-free stock video (and photo) footage which I got from Pexels and Pixabay.
Some more inspiration
If you want some creative inspiration I would highly recommend to watch the following video made by Sandwich Video on how to create a cool ad without (much) money:
Make sure to also check out the making-of video, as it is both interesting and covers a couple of simple tricks to improve your videos without any additional costs!
Last but not least, please also have a look at this wonderful video abstract made by Roan Plotz (et al.) for their paper “Oxpeckers Help Rhinos Evade Humans”:
Thanks for reading! I hope you enjoyed this little making-of, and have fun producing video abstracts 😊